Licence Validation
The Licence Validation tab is where you register the HoloMIT licence token in the Unity editor. The token is validated offline and stored in Unity's PlayerPrefs, so it persists across editor sessions — you only need to enter it once per machine.
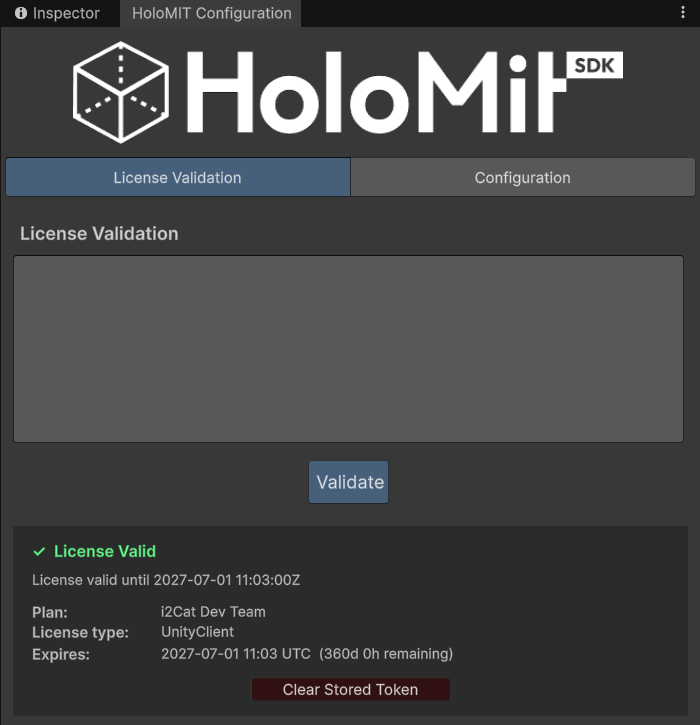
How to validate your licence
- Open the HoloMIT Configuration Window (
HoloMIT → Configuration). - Make sure the Licence Validation tab is selected (it is the default).
- Paste your licence token into the text area.
- Click the Validate button.
The result panel will appear immediately below the button.
Getting a licence token
For instructions on how to obtain the development licence key, please contact marc.martos@volum.tech.
Result panel
After validation, a coloured panel displays the outcome.
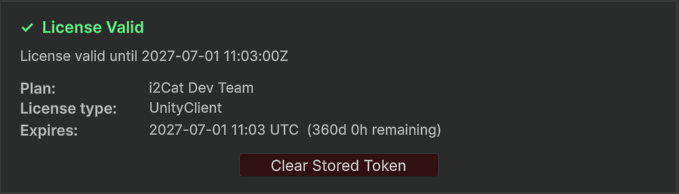
| Field | Description |
|---|---|
| Status | Green ✓ Licence Valid or red ✗ Licence Invalid |
| Message | A short description of the validation result or the reason for failure |
| Plan | The licence plan name associated with the token |
| Product | The product the licence covers (e.g. SDK) |
| Expires | Expiry date and time in UTC, plus time remaining |
If the token is invalid or expired, the panel turns red and the message field explains why.

Stored token
Once validated, the token is saved automatically in PlayerPrefs. The next time the project is opened, the stored token is validated silently and the result panel is populated without any manual action.
To remove the stored token (e.g. when switching machines or rotating keys), click the Clear Stored Token button that appears inside the valid result panel.