Basic Integration
The HoloCapturerPipeline allows the HoloMIT SDK to render volumetric video, live or pre-recorded, and locally or remotely.
Requirements
- Updated NVIDIA drivers.
- The ones present in CameraConfig
Integration
You can acces a sample scene already set up in the directory Assets/Sample_Scenes/HoloCapturerPipeline, but if you want to set it up yourself checkout the following steps:
- Create a new Unity project and import the HoloMIT SDK.
- Open the
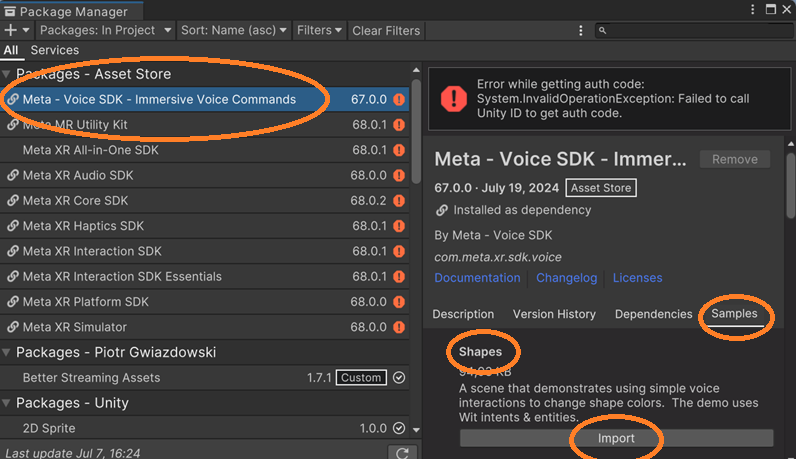
Package Managerand, from theHoloMIT SDKpackage, import the sampleHoloCapturerPipeline.
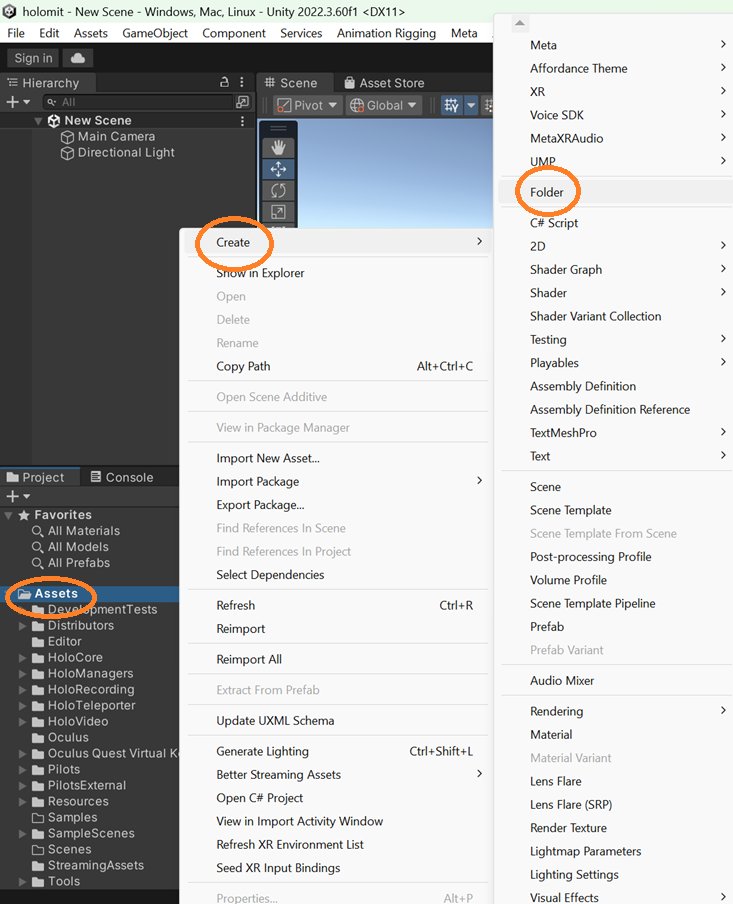
- Right-click the
Projecttab and create a new folder namedScenes.
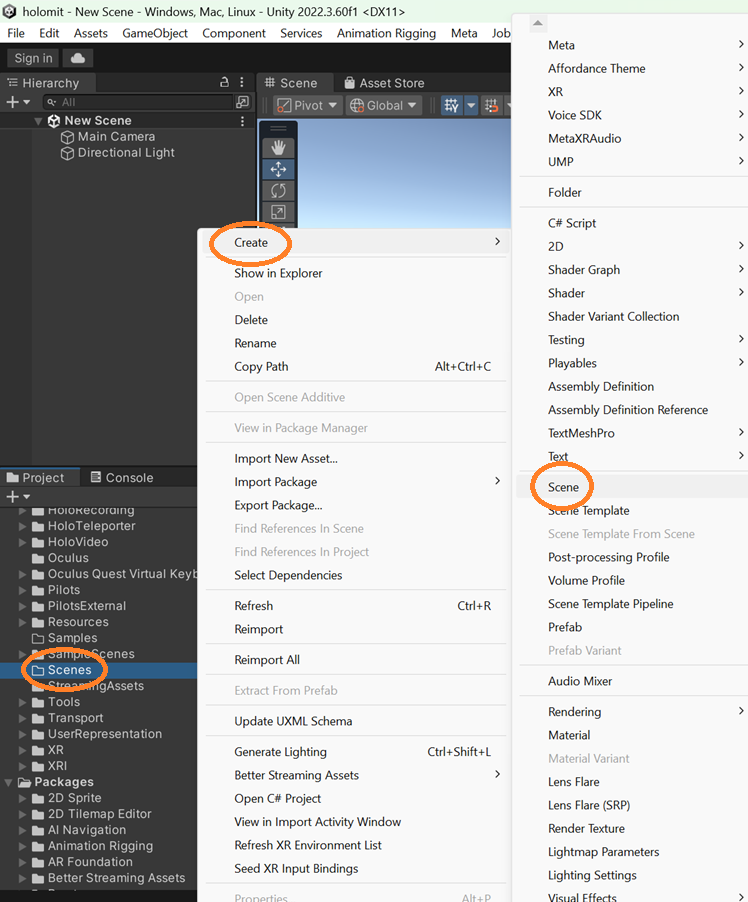
- Inside the folder, create a new
Sceneand name itHoloCapturerPipeline.
- Double-click it to go into it.
- Once inside, right-click the scene
Hierarchytab, create anEmpty Game Object, and call itHoloCapturerPipelineInitializer.
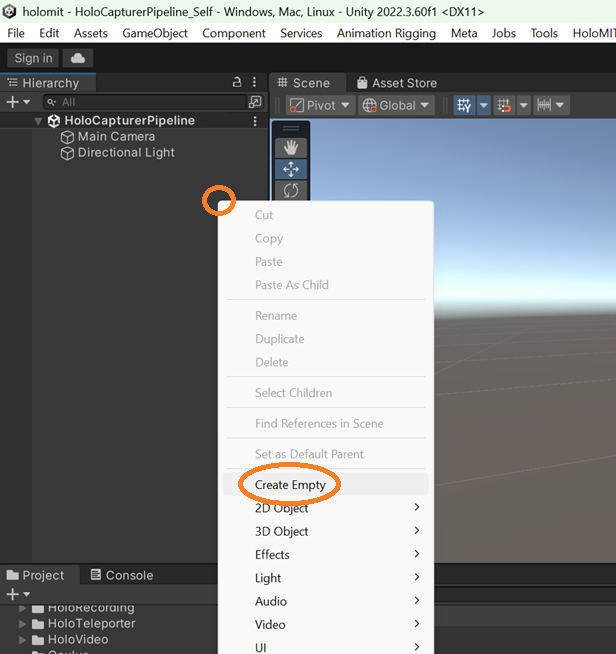
- Select the game object
HoloCapturerPipelinefrom theHierarchytab you just created and in theInspectortab, itsTransformcomponent should appear. This is the position of the object in the scene. Right-click it and hitResetto position it at the center of the scene.
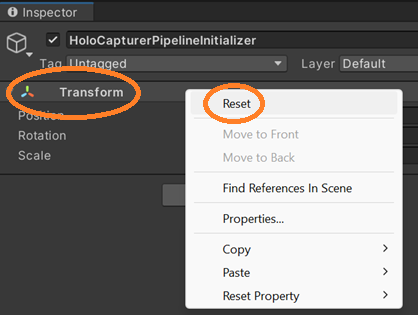
- Inside this same game object, hit
Add Component, search forHoloCapturerInitializer, and select it.
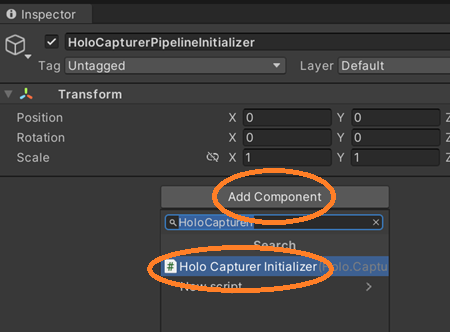
- Make sure the
cameraconfig.jsonfile is set up correctly to your preferences. - Hit play, and in the
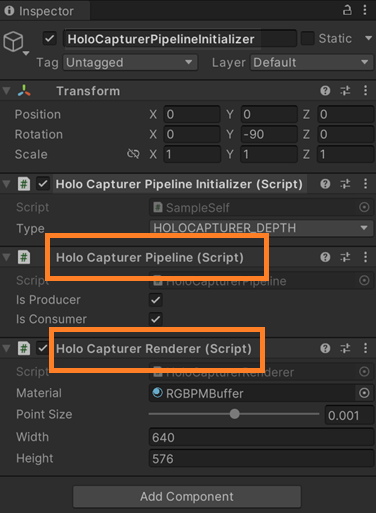
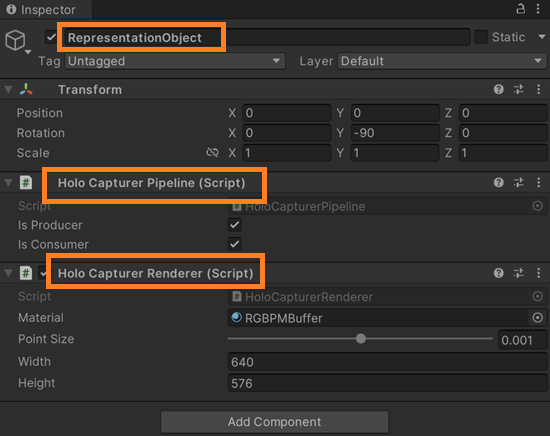
Gametab, you will see a volumetric representation. What appears in this tab will be what is shown in the build. If you select theHoloCapturerInitializerobject and checkout theInspectortab, you will see two new components:HoloCapturerPipeline: script that handles the representation pipeline.HoloCapturerRenderer: script that handles the rendering of the representation.
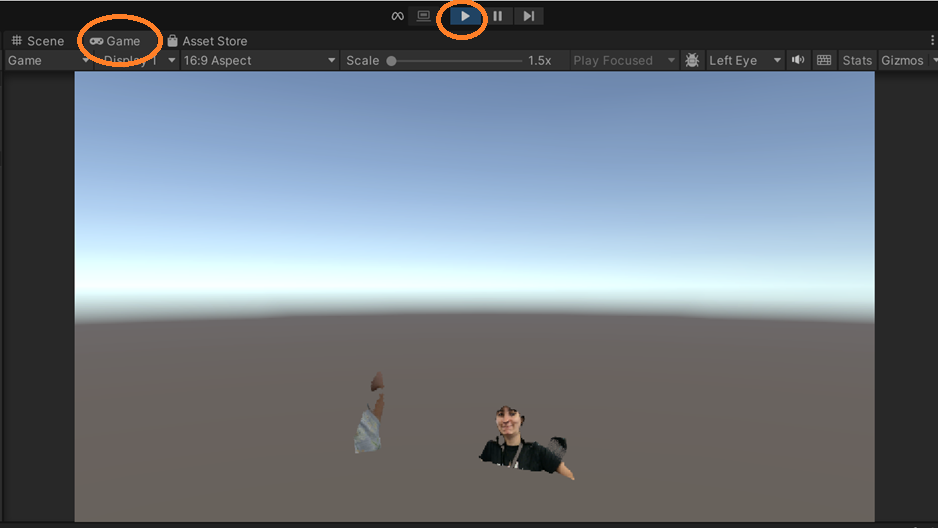
Configuration parameters
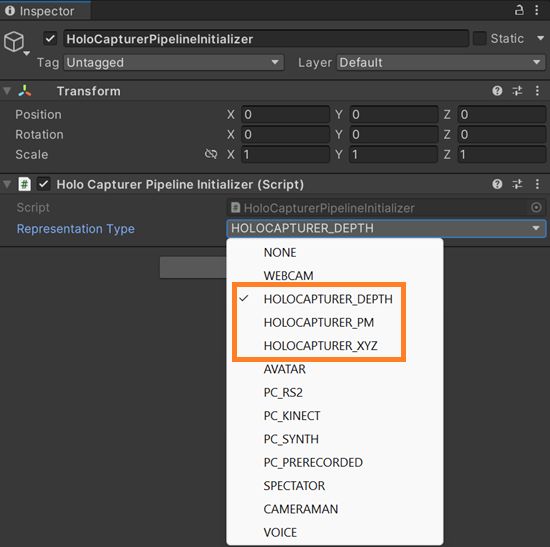
In the HoloMIT SDK, there are many representation types. The HoloCapturerPipeline includes 3:
HOLOCAPTURER_DEPTH: The default type. It's based on the depth of the camera.HOLOCAPTURER_PM: It uses a position map provided by the camera.HOLOCAPTURER_XYZ: Exclusive type for pre-recordings. It is a format designed to render point clouds that don't come from a camera.
Use cases and good practices
Representation position
If the representation appears too far away or not in the right position in the Game tab, check out the Transform component of the Main Camera game object present in the scene. The Z coordinate by default has a value of -10. To get closer to the representation, reduce the number, for example, -2.

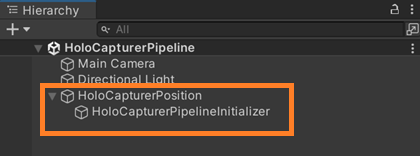
Be aware that modifying the Transform of the HoloCapturerInitializer game object will not work, since the pipeline automatically recenters it and applies the correct rotation at the start of the playthrough. To place a representation in a specific place, you must create a new game object and place the HoloCapturerInitializer game object as its child. To do this, just create a new Empty and drag the HoloCapturerInitializer on top of it. If you modify the transform of the new object (the parent), it will be maintained when running the app.
Keep in mind that any changes made to the components of game objects during runtime will not be maintained.
Set representation in other object
If you wish to have the HoloCapturerPipeline's components in an object other than the HoloCapturerInitializer, you must modify the SampleSelf.cs script.
- First, add a
GameObjecttype variable. Make itSerializeFieldso it shows in theInspector.

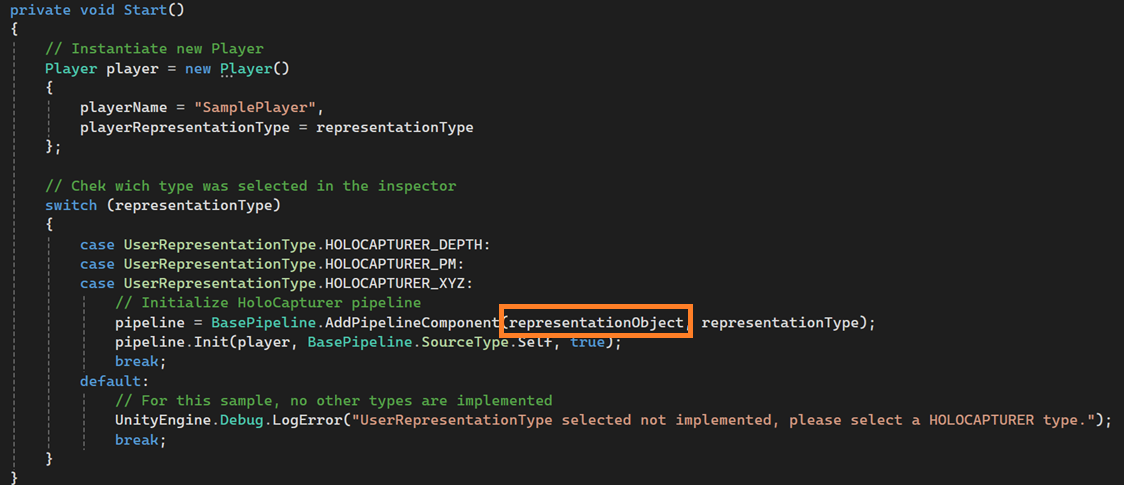
- Then, change the destination game object from
gameObject(which is the game object this script belongs to, which would beHoloCapturerInitializer) to the name of the variable we just created, in this caserepresentationObject.
- Back in the Unity Editor, create a new game object and drag it into the new slot appearing in the
HoloCapturerInitializercomponent.

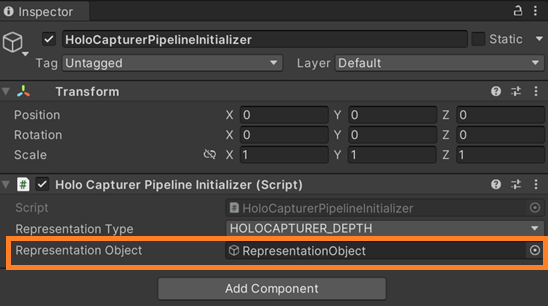
- Now if you hit play, the
HoloCapturerPipelineandHoloCapturerRendererwill appear in theRepresentationObjectgame object instead of theHoloCapturerInitializergame object.
Point Size
You can modify the point size of the representation via the Inspector tab. Select the object HoloCapturerInitializer, and in its Inspector you will find a new HoloCapturerRenderer component. This is what is actually rendering the representation. The point size can then be modified via the provided slider.
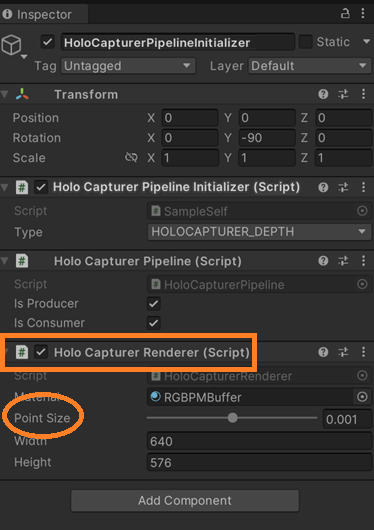
Alternatively, it can be modified pre-runtime in the config.json file under the RGBPMs section.
Find representation in Scene
If you can't seem to find the representation in the Scene tab, it may be that you have moved around and are not centered properly. To center the view onto a specific game object, double-click it in the Hierarchy tab. If you still can't see it, try zooming in with the mouse wheel.
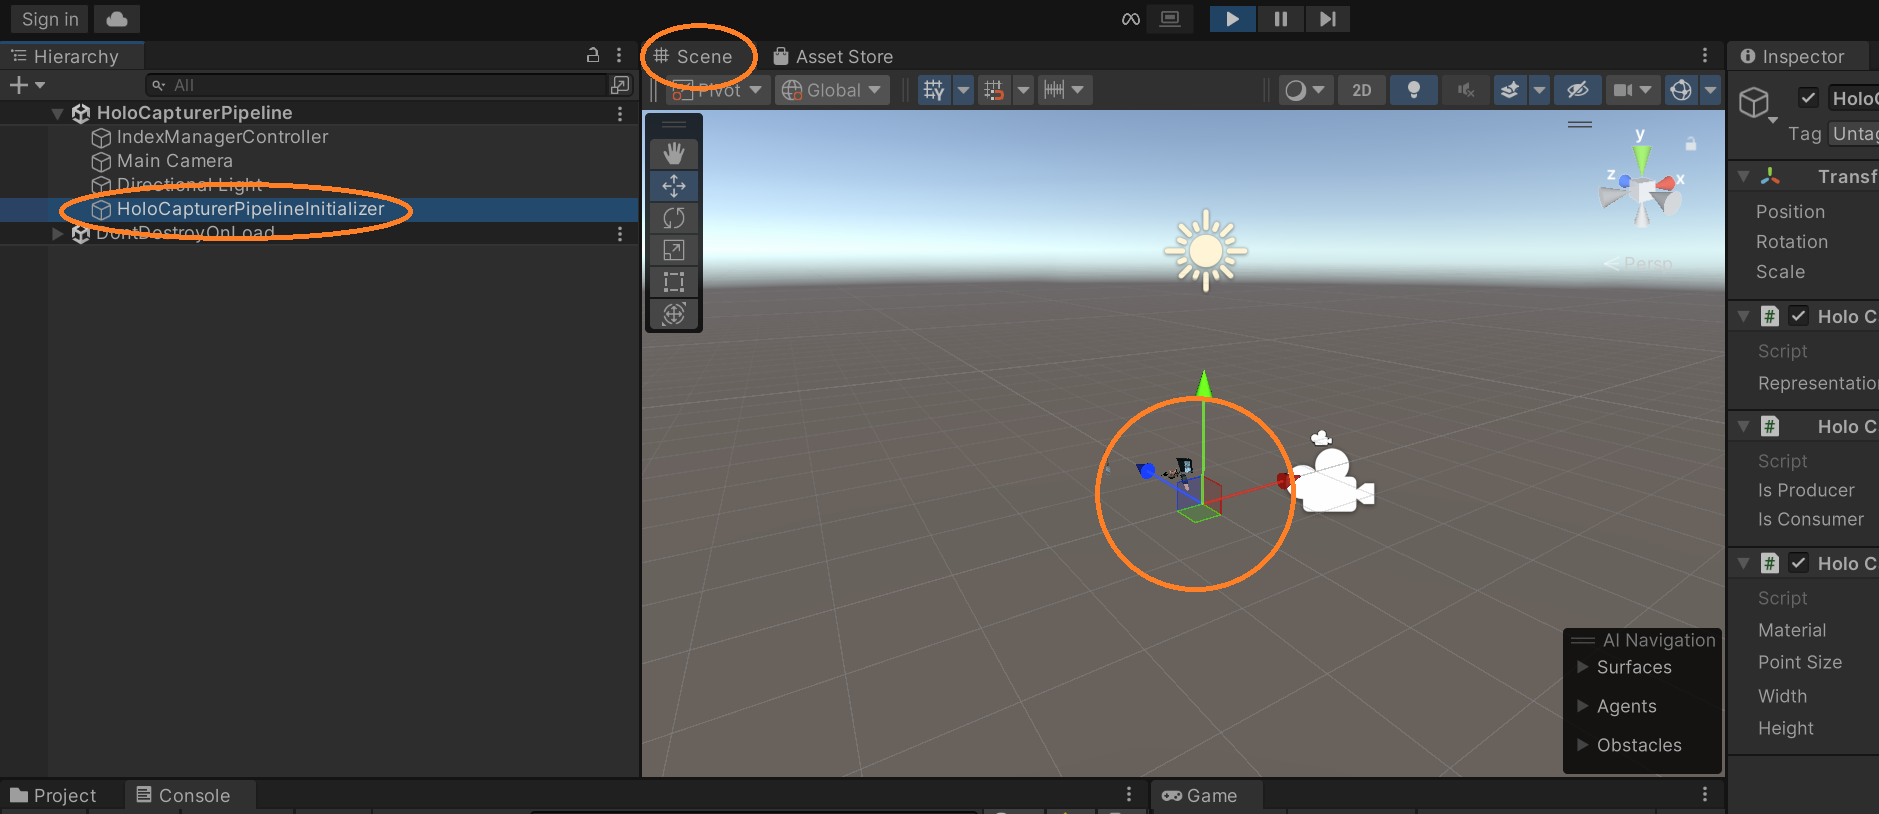
In the image, you can see that in the Game tab the representation is present, but not in the Scene. Double-click the HoloCapturerInitializer object and now it's centered, but very far away. Use the mouse wheel to zoom in.
Camera config file error
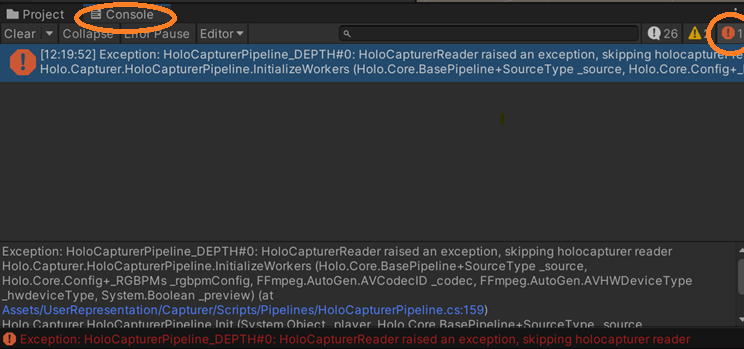
If you hit play but the representation still doesn't appear, a very common error is that the cameraconfig.json is not set up properly. Check out the Console tab and make sure errors are activated (top right exclamation point). If the error shown in the image is present, it means the cameraconfig.json is not correct — most commonly a camera serial number or the path to the pre-recording is missing or wrong.
