How to Calibrate
The overall steps for calibrating are:
- Setting up the cameras in space
- Position the calibration board
- Calibrate*
- Usage*
*Steps 3 and 4 are described in the main README.md file.
Position the calibration board
After the cameras are set up, take advantage of the viewer to check how the cameras see the calibration board used. See Calibration Boards for the instructions of how to build new calibration boards.
Angle of the calibrator
The position of the calibrator with the respect to the camera is really important:
- Properly detect the markers → color image
- Decrease depth errors → if the angle is too closed, the alignment between color and depth will be more imprecise.
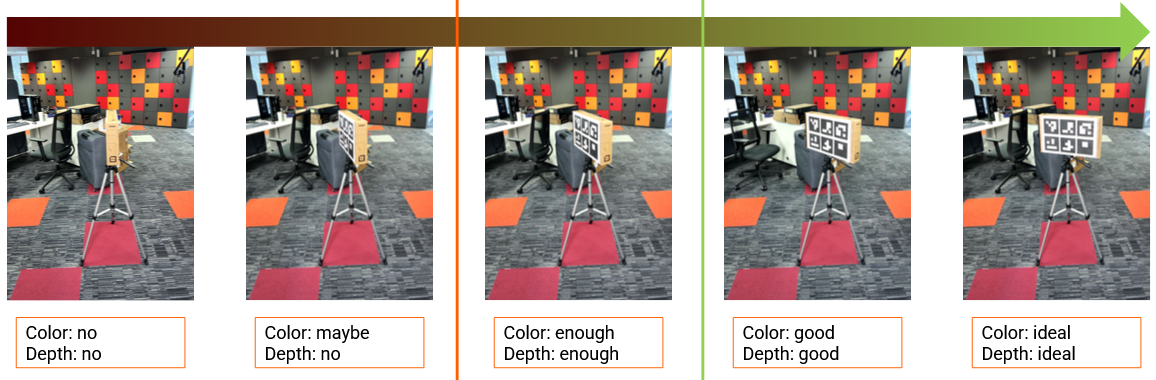
Figure 4: How the angle of the calibrator with the camera affects calibration results
Since we are limited by the camera positions, try:
- moving the calibrator off the center
- orient it between two cameras
BUT the position of the calibrator marks the reconstructed object coordinate system: center and axis (below). The height of the resulting center should be changed when running the calibration by passing it as the third argument.
