Integration with Sessions
The HoloCapturerPipeline is available as a local representation of data and also a remote one. The BasicIntegration is a local pipeline. Here we will provide step-by-step instructions to represent a remote pipeline.
Requirements
Follow the BasicIntegration tutorial to make sure a local pipeline works.
Integration
HoloCapturerSender
- Create a new scene and call it
HoloCapturerSender. - Create a new game object and call it
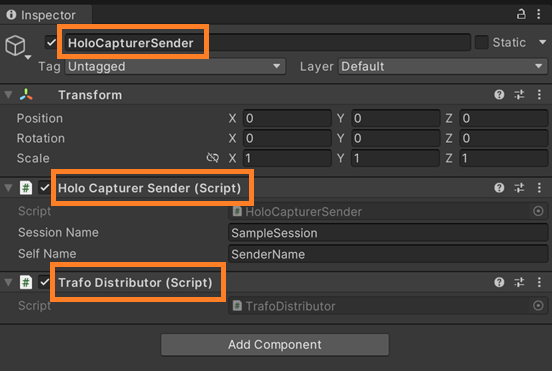
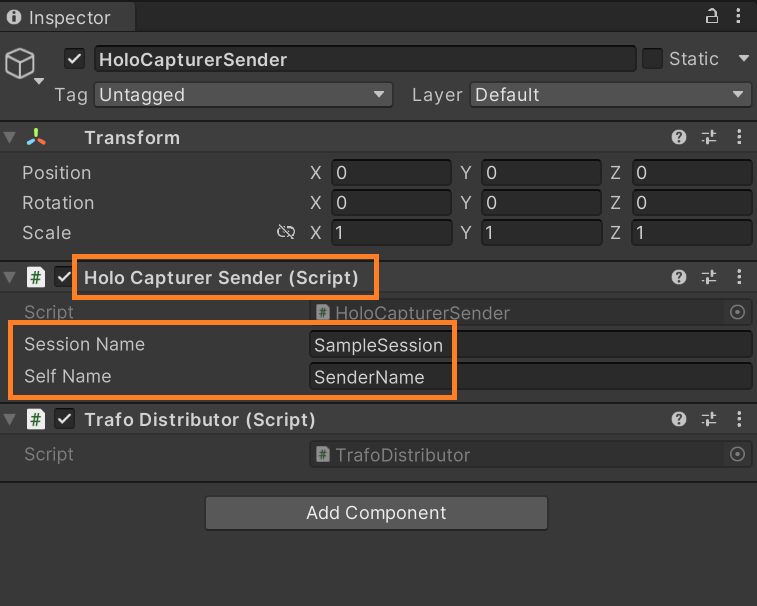
HoloCapturerSenderas well. - Add to the
HoloCapturerSendergame object the componentsTrafoDistributorandHoloCapturerSender.
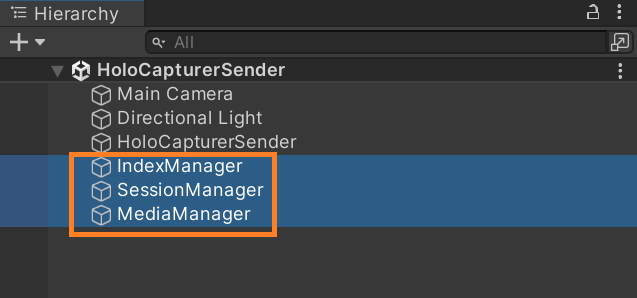
- Add the necessary managers to the scene.
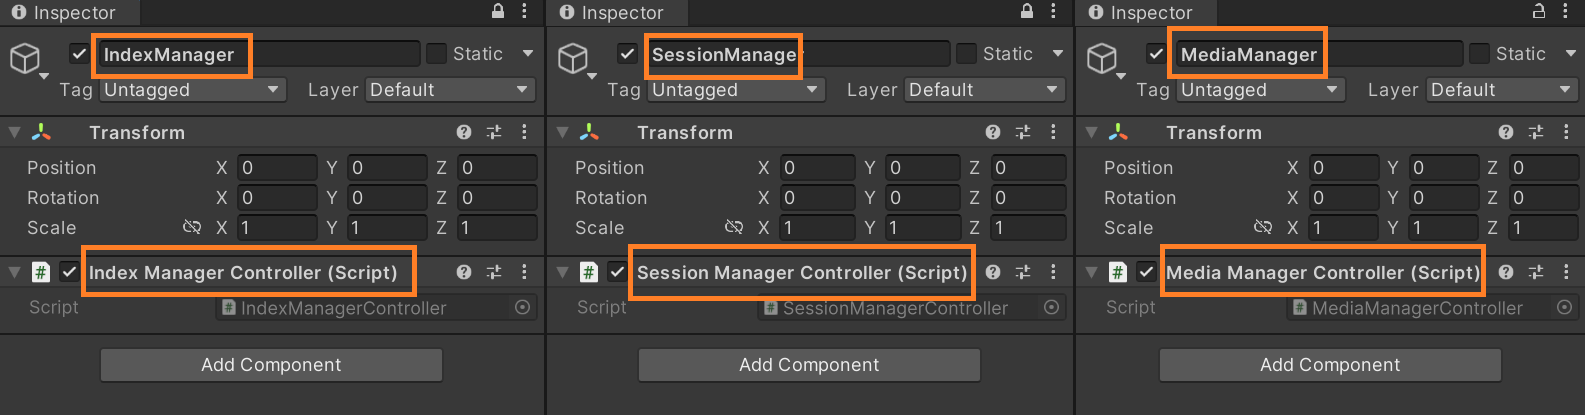
- Create a new game object called
IndexManagerand add the componentIndexManagerController. - Create a new game object called
SessionManagerand add the componentSessionManagerController. - Create a new game object called
MediaManagerand add the componentMediaManagerController.
- Create a new game object called
- Select the
HoloCapturerSenderand check out itsInspector. Here you can edit theSessionNameand theSenderName, or leave the default ones.
HoloCapturerReceiver
- Create a new scene and call it
HoloCapturerReceiver. - Create a new game object and call it
HoloCapturerReceiveras well. - Add to the
HoloCapturerReceivergame object the componentsTrafoDistributorandHoloCapturerReceiver.

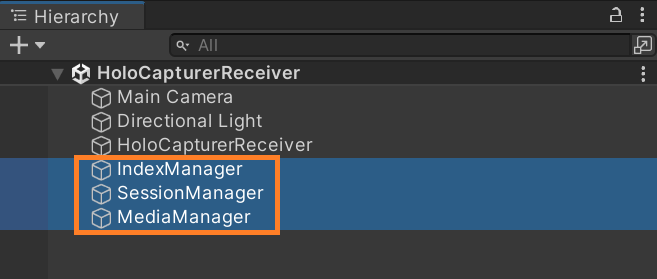
- Add the necessary managers to the scene.
- Create a new game object called
IndexManagerand add the componentIndexManagerController. - Create a new game object called
SessionManagerand add the componentSessionManagerController. - Create a new game object called
MediaManagerand add the componentMediaManagerController.
- Create a new game object called
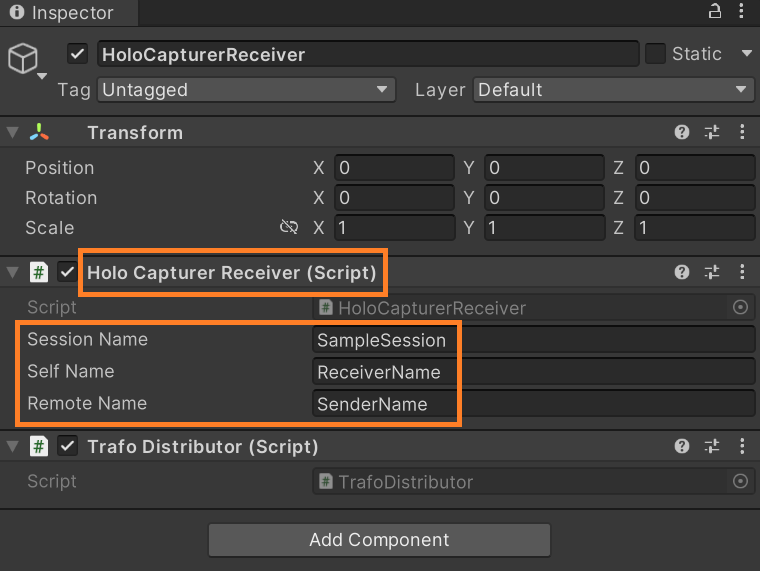
- Select the
HoloCapturerReceiverand check out itsInspector. Here you can edit theSessionName, theReceiverName, and theSenderName, or leave the default ones.
IMPORTANT! TheSessionNameand theSenderNamemust align with the ones in theHoloCapturerSender.
Building project
To use the remote features of the HoloCapturerPipeline, you must create a build for the HoloCapturerSender scene and another one for the HoloCapturerReceiver scene. That is because in a single run of the app, only one user in the session is possible. To use the remote features, two users (the sender and the receiver) are necessary — hence two builds that we will run simultaneously.
- Open the scene
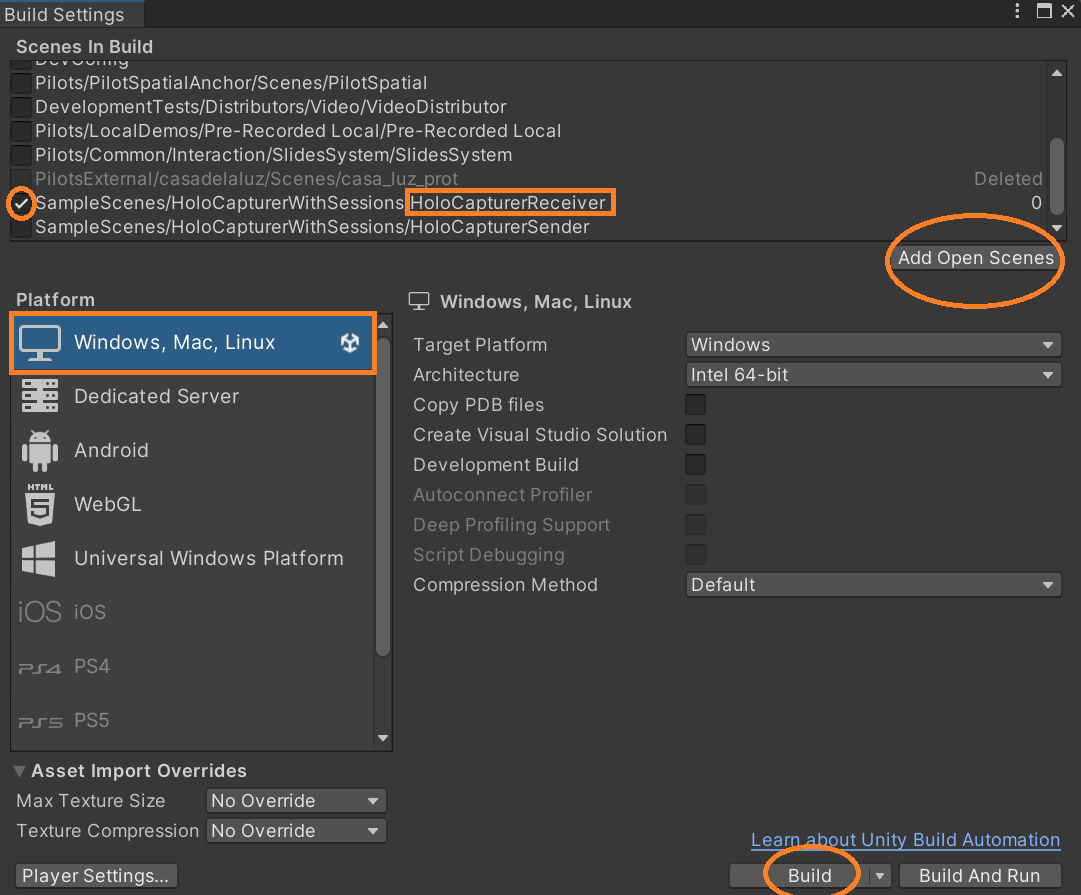
HoloCapturerSender. - Open the tab
File/Build Settingsand hitAdd Open Scenes. Make sure the sceneHoloCapturerSendernow appears in the sectionScenes In Buildand that it's the only one checked.
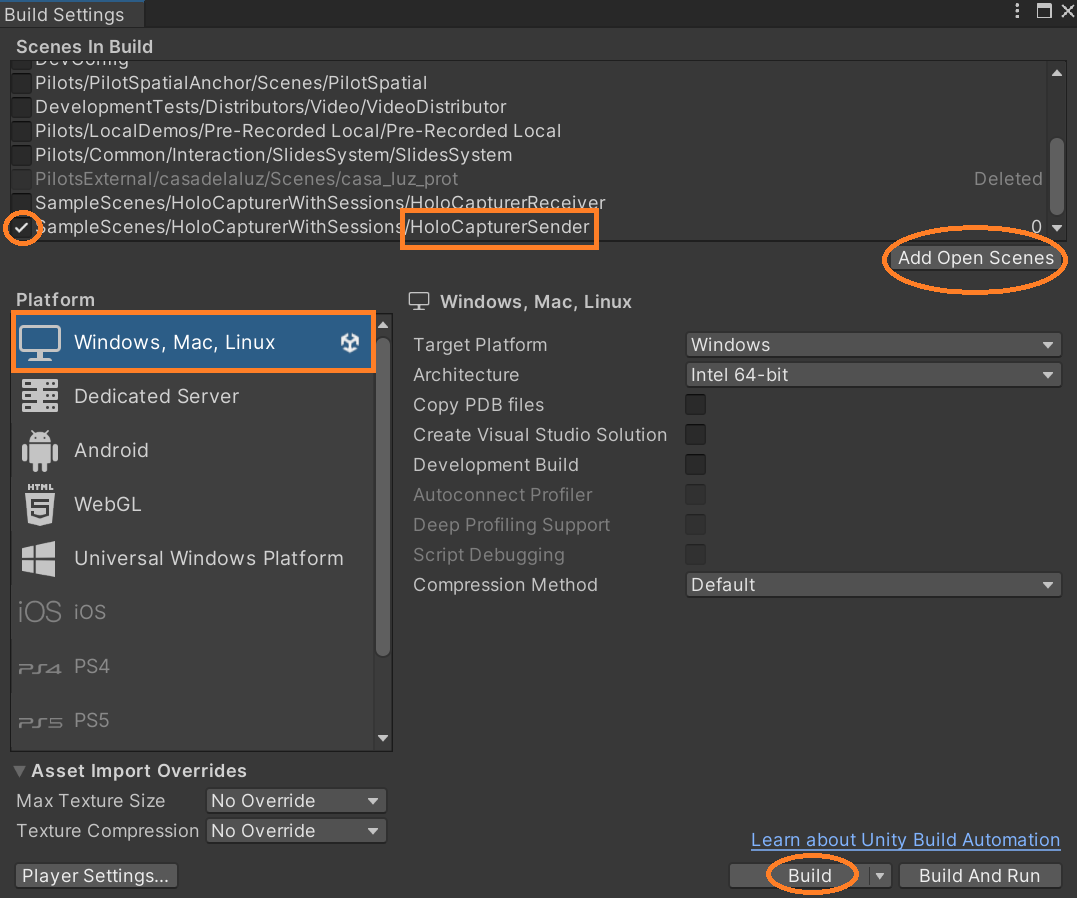
- Make sure the platform selected is
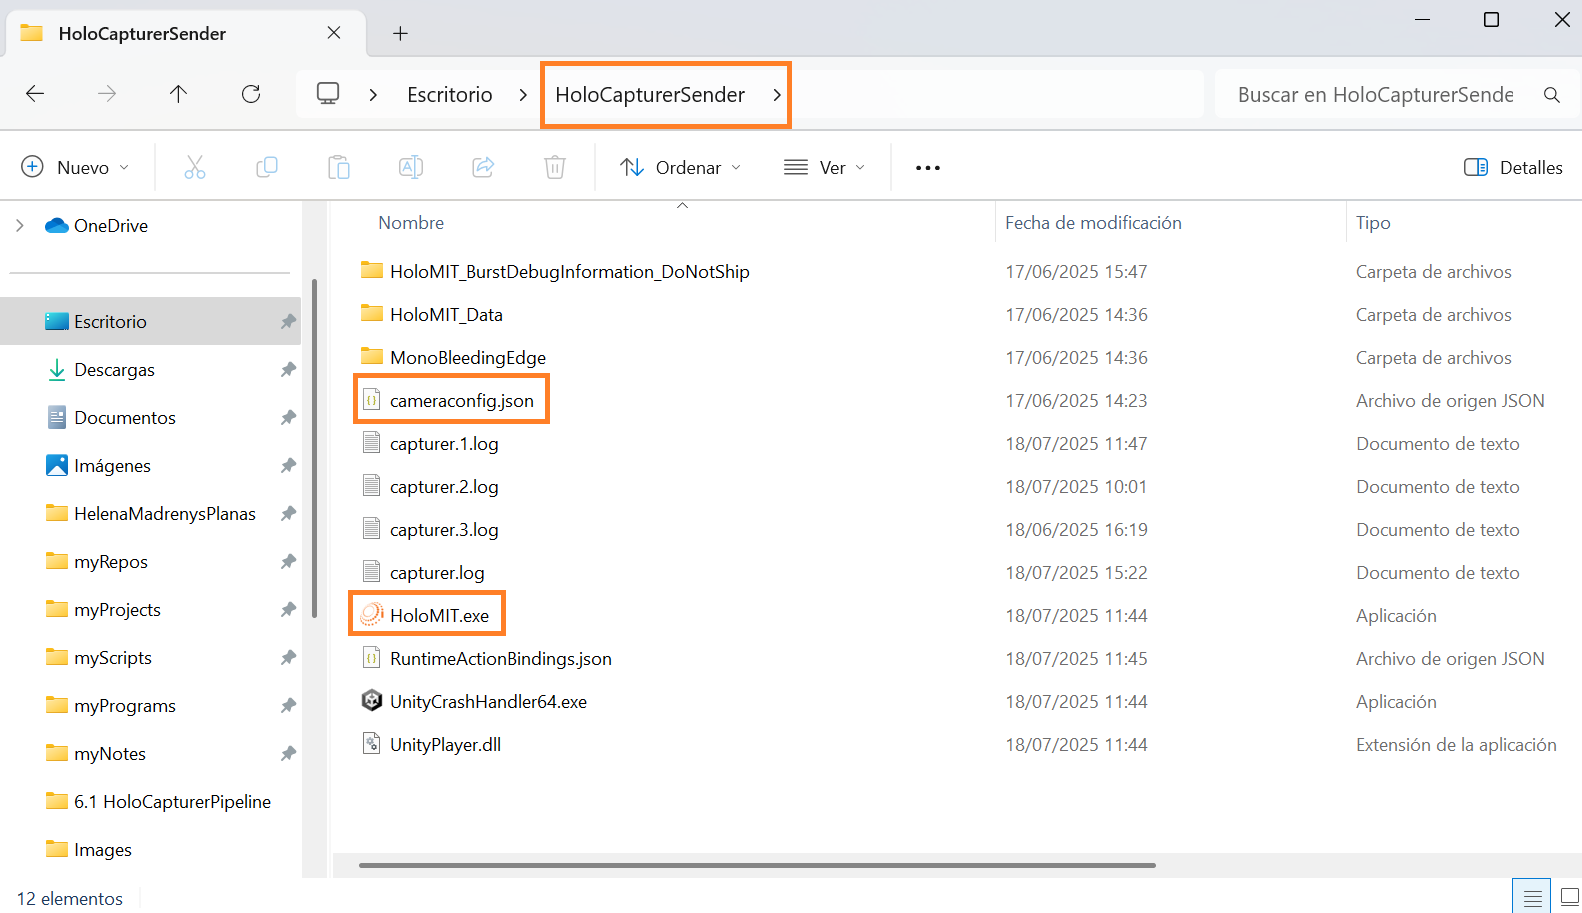
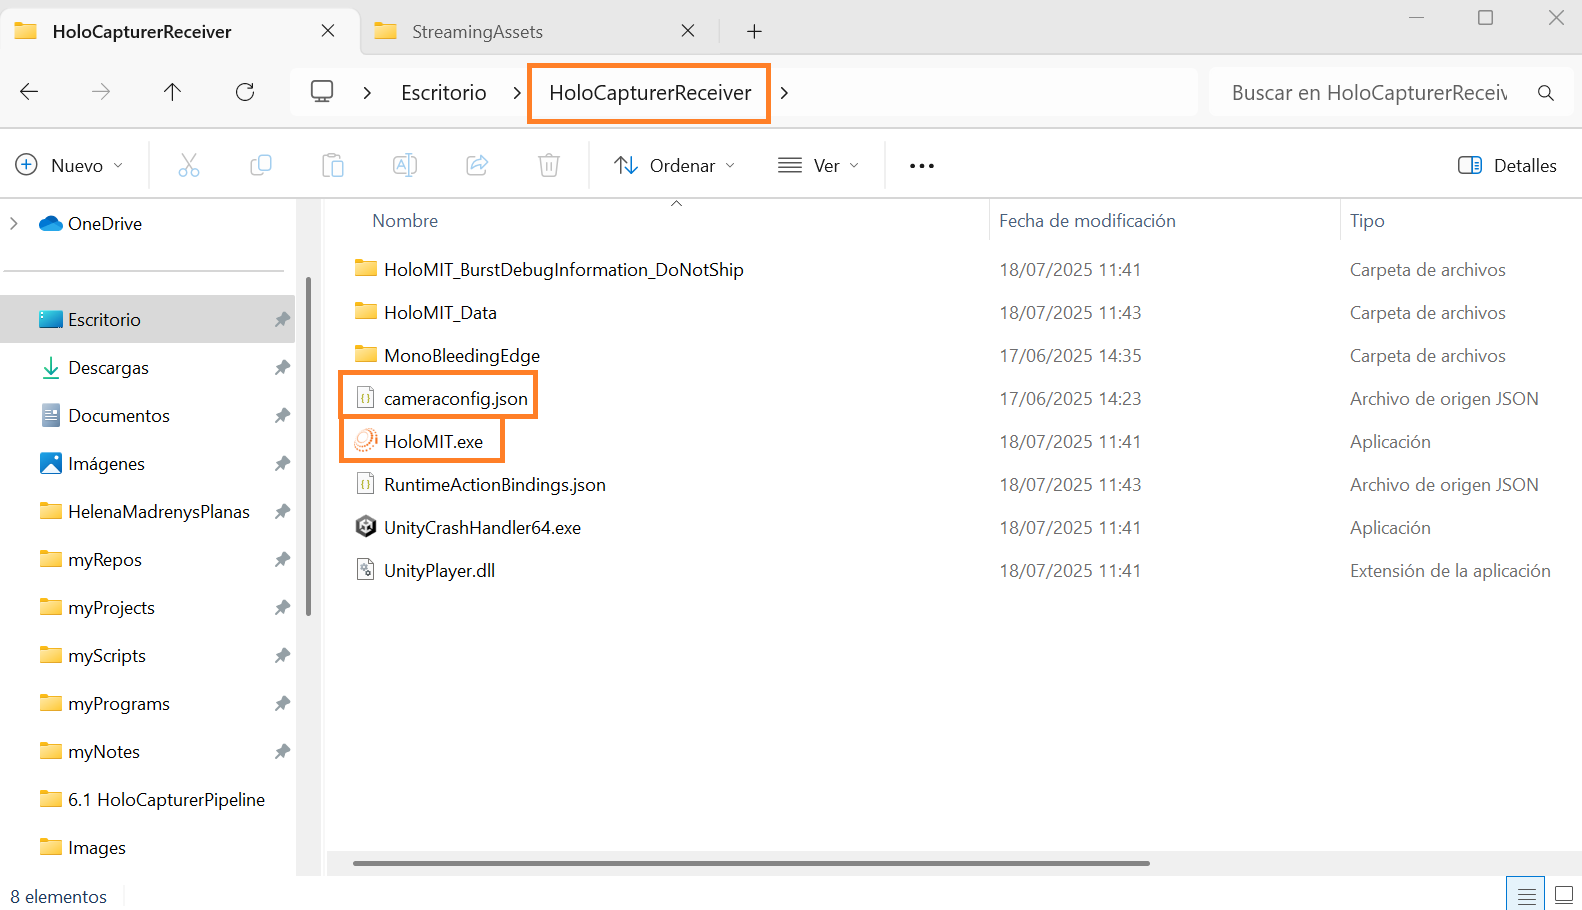
Windowsand hitBuild. - Create a directory for the
buildcalledHoloCapturerSender. - Wait until Unity has finished building the project. This may take a while.
- Repeat the steps for the
HoloCapturerReceiver. Take into consideration that:- In the
Scenes In Buildsection, now the only one checked isHoloCapturerReceiver. - You must create a new directory so you don't overwrite the already existing build.
- In the
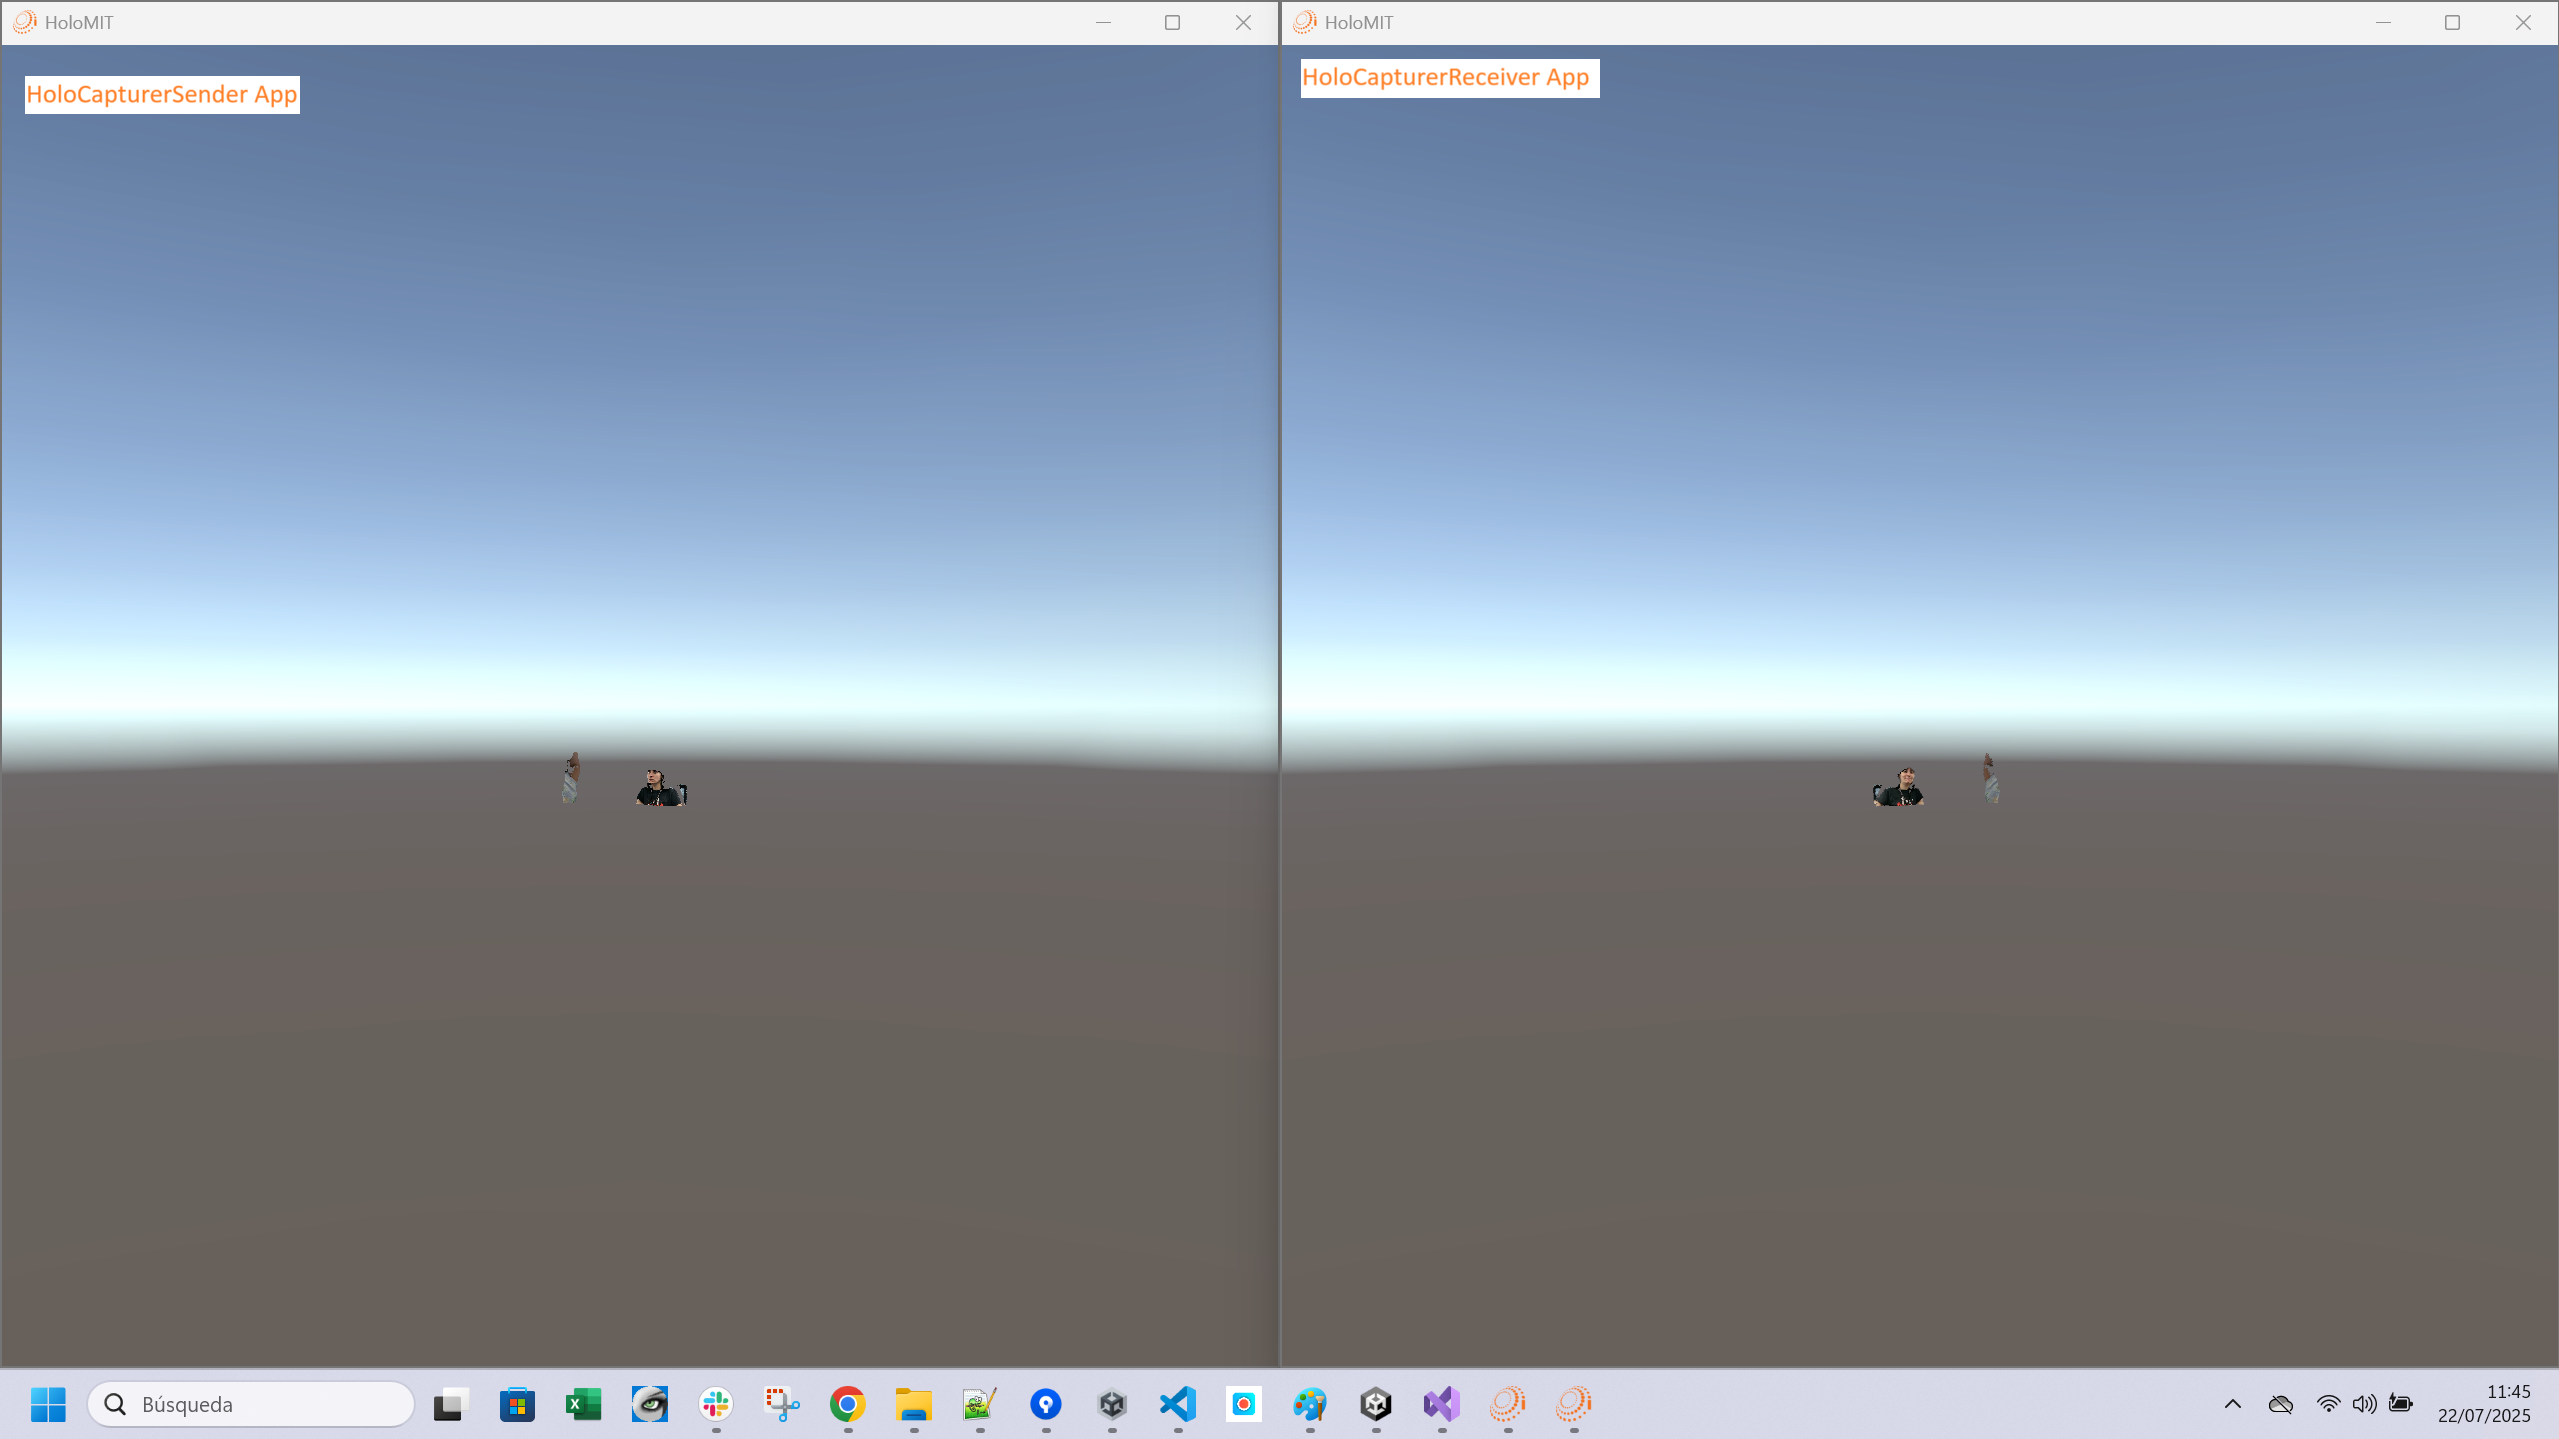
- Run the
HoloCapturerSenderapp. - When the representation shows up, run the
HoloCapturerReceiverapp. - It may take a while, but the representation running localy in the
HoloCapturerSendernow will also appear in theHoloCapturerReceiveras a remote representation.
Use cases and good practices
Take it one step at a time
Make sure that the local pipeline works properly before trying the remote. Use the HoloCapturerSender scene in editor by itself, it should show the local representation.
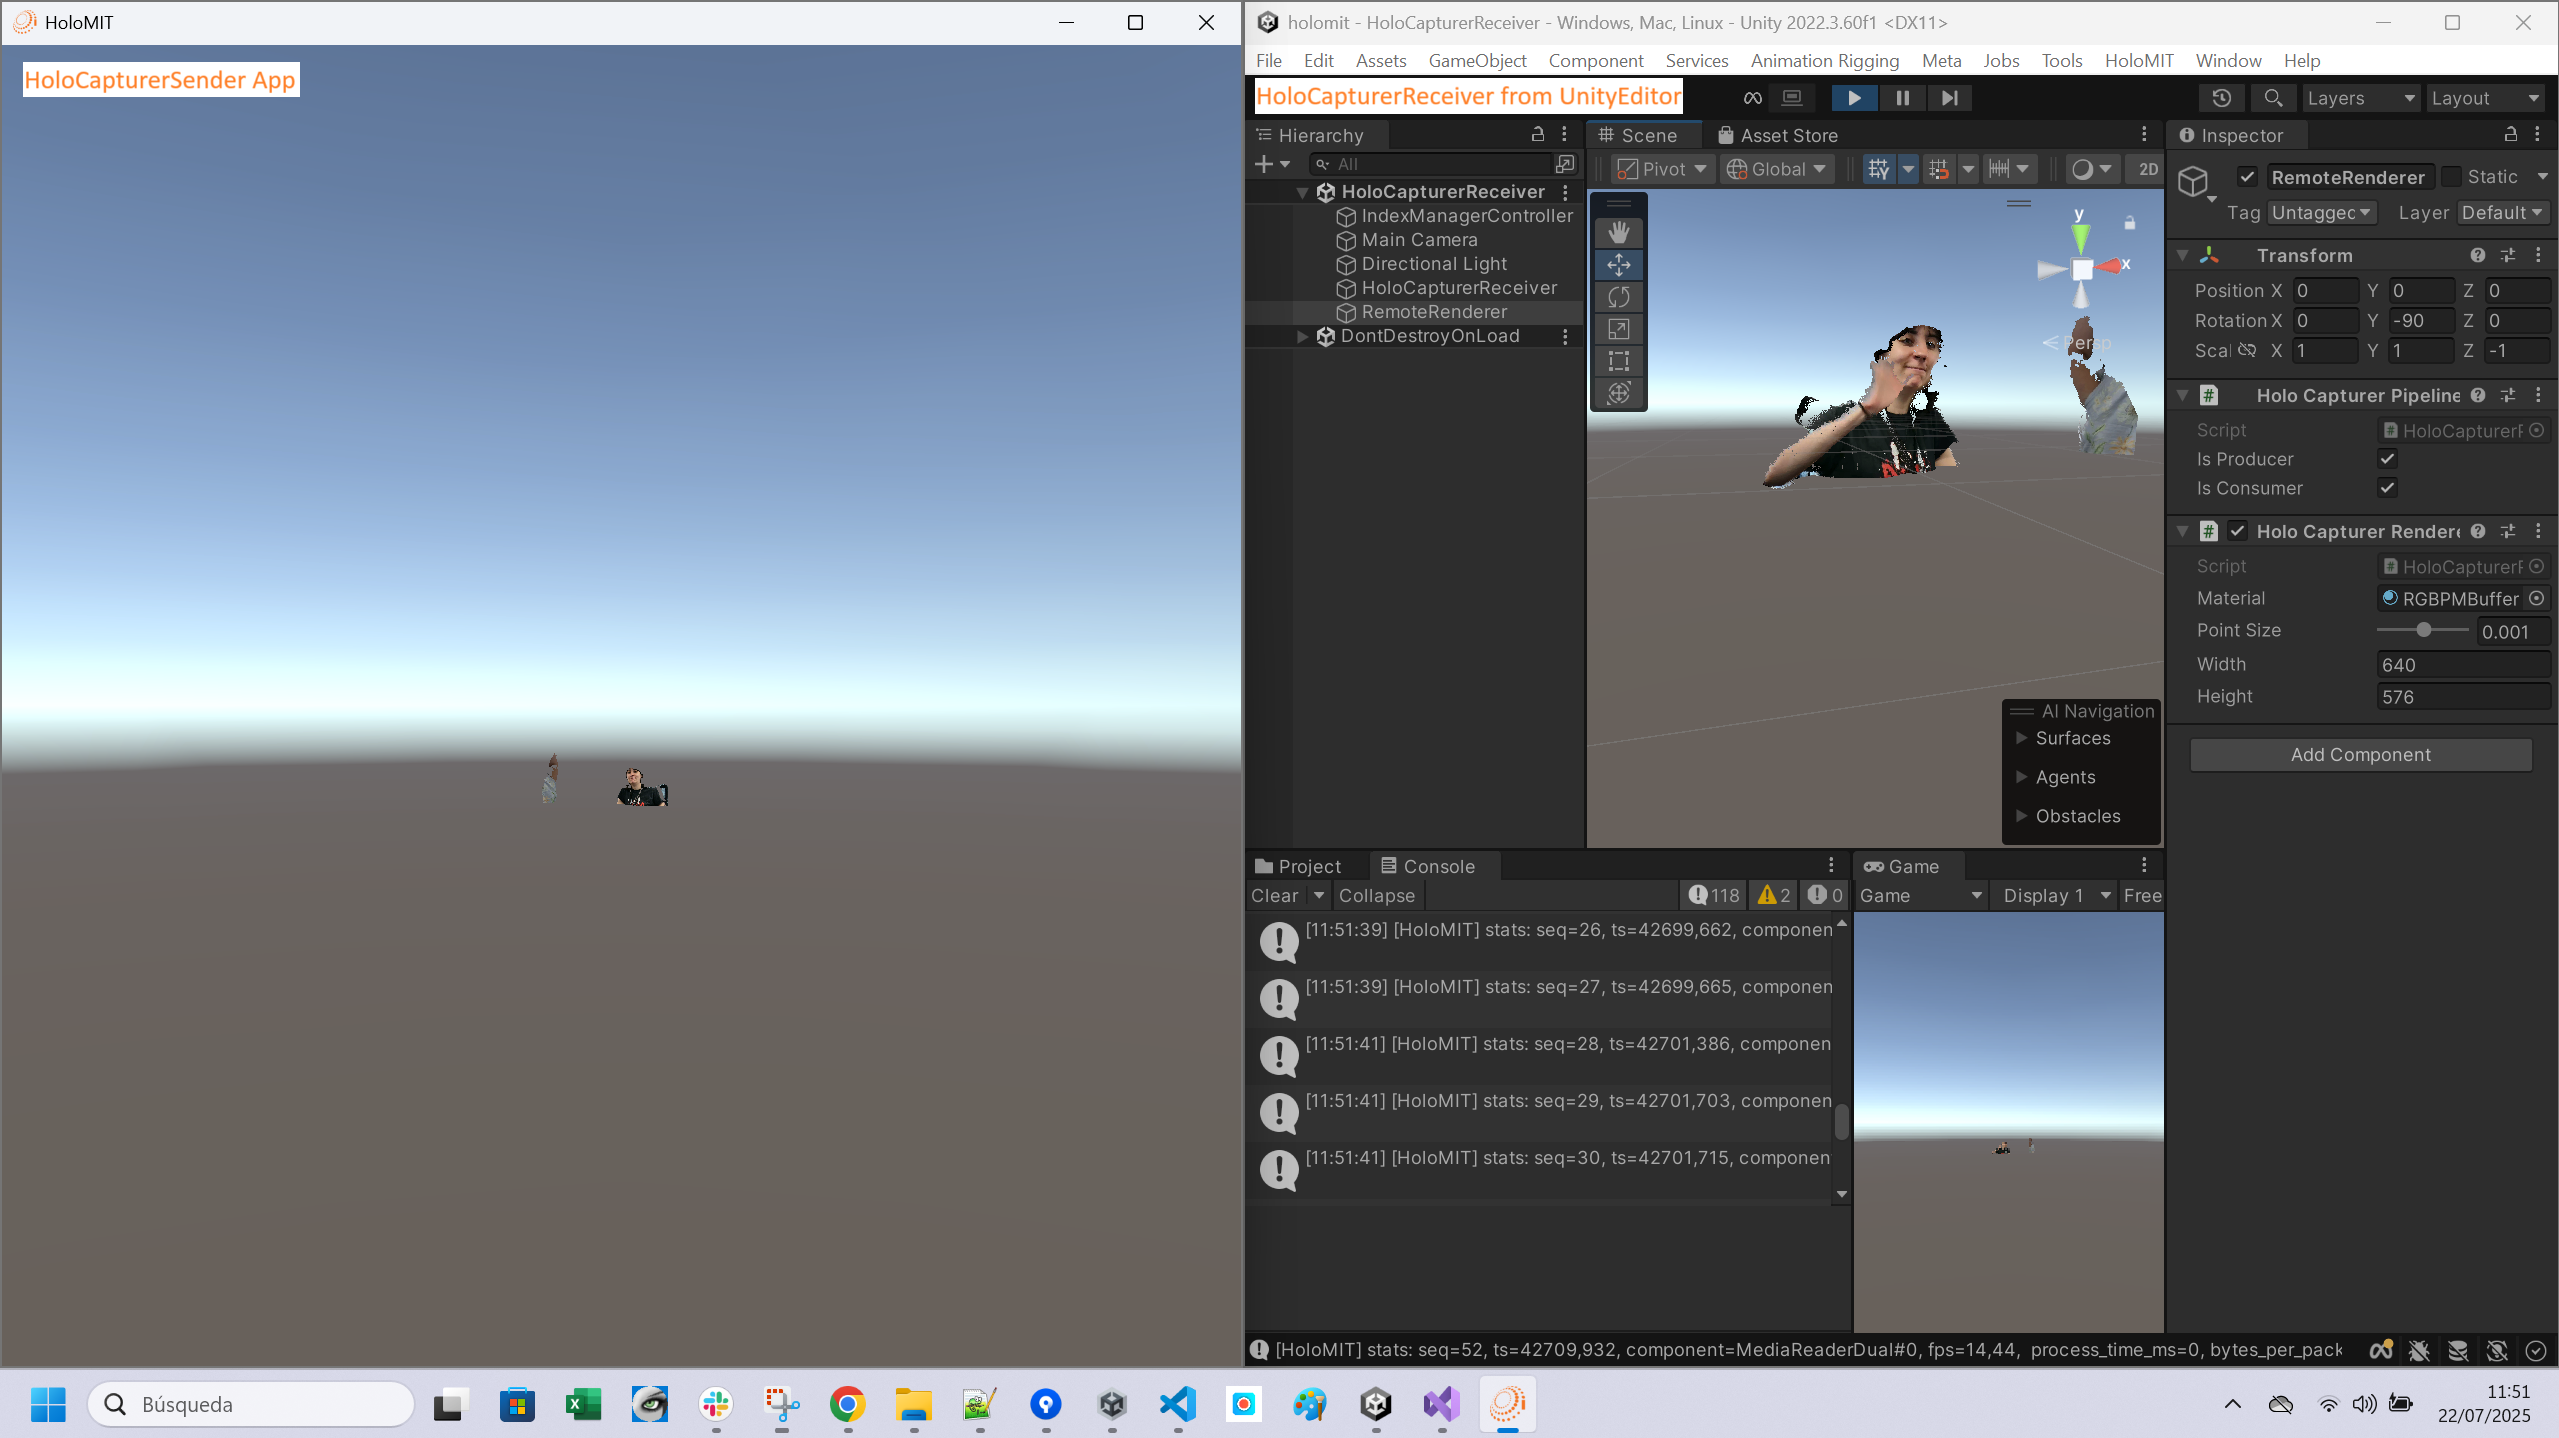
Build-Editor
You don't need to run both scenes as builds. If you wish to debug, you can run one in the editor and the other as a build to see the HoloMIT debug messages appear in the Console tab of the editor.
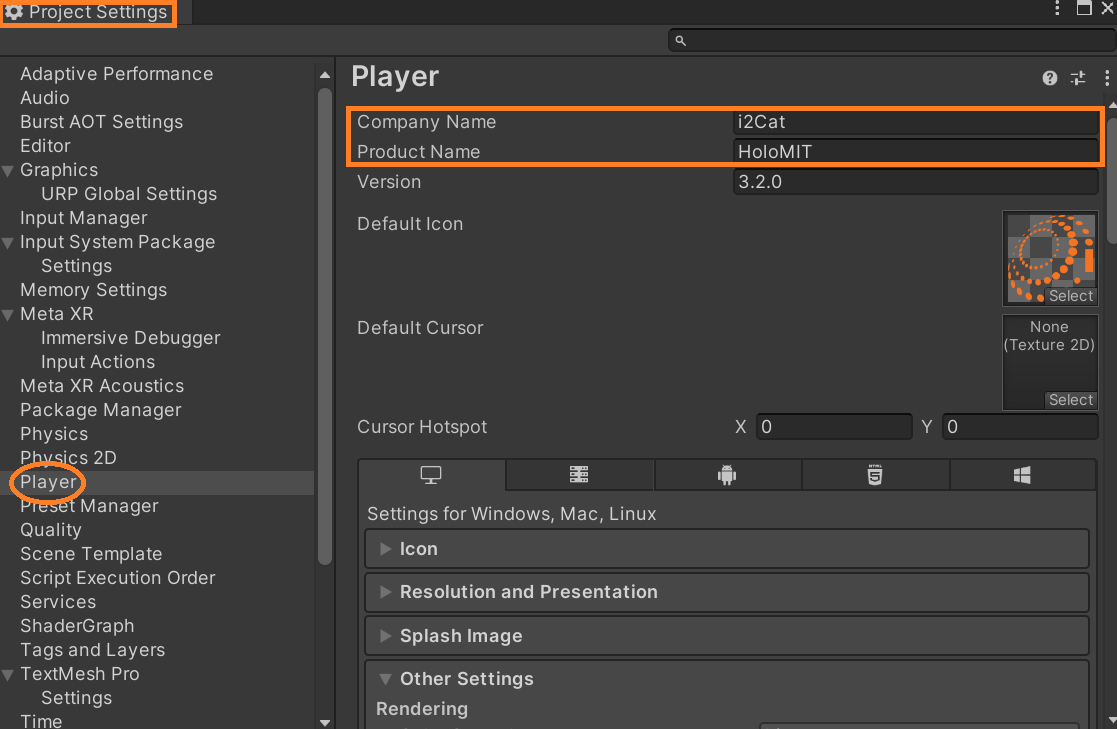
Debug in Build
If you wish to see these messages from a build, first open the Unity Editor and go to the tab Edit/Project Settings. Consult the tab Player and look for your Company Name and your Product Name. In our case, i2Cat and HoloMIT.
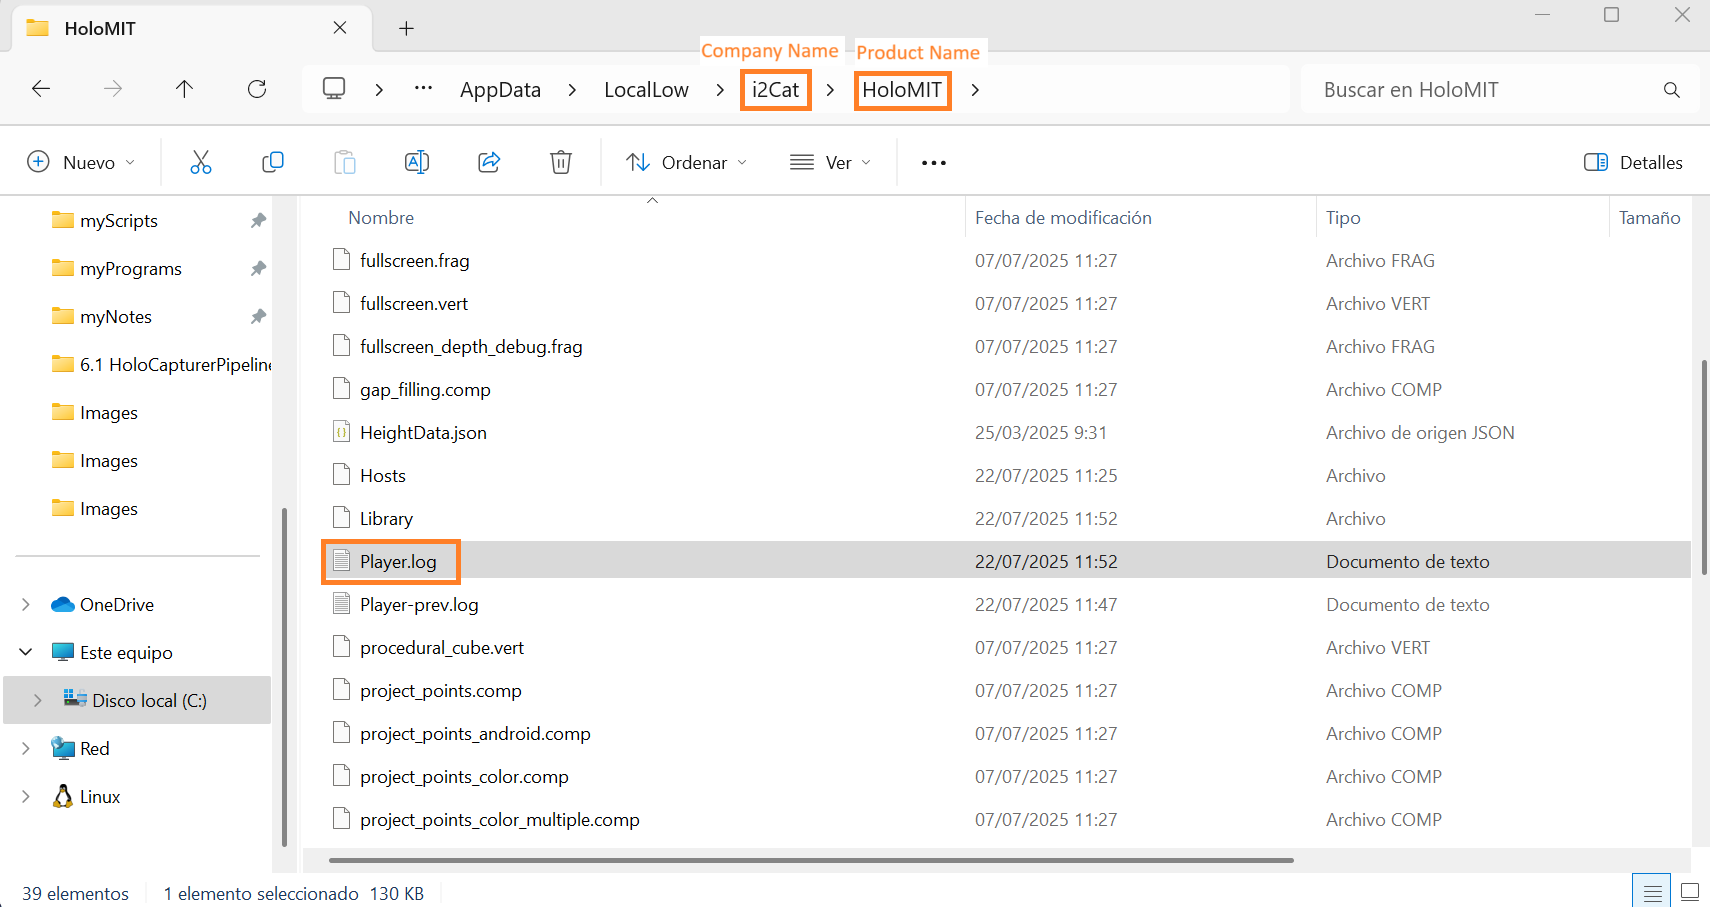
Afterwards, open your File Explorer and go to C:\Users\YourUser\AppData\LocalLow\YourCompanyName\YourProductName. In this location, you will find a file called Player.log. This file contains all the debug messages from your app.
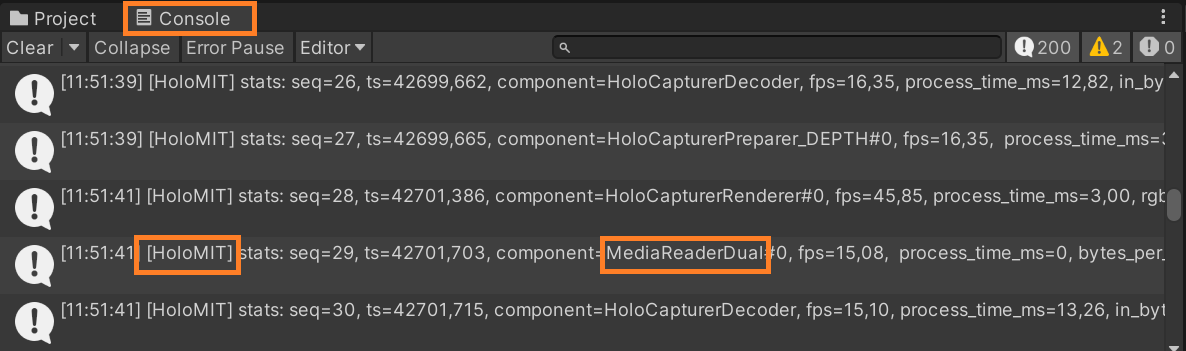
Debug messages
If the remote representation is not working, look at the Console tab and look for HoloMIT messages that confirm the connection has been made correctly such as:
Sender:
- The session was created:
[HoloMIT] [SessionManagerController][OnCreateSessionResponse] SampleSession - 3058080948 - SFU - Pilot0
- You have joined the session:
[HoloMIT] [SessionManagerController][OnJoinSessionResponse] Joined to session SampleSession and assigned PlayerID 1076983080
- The pipeline is sending data:
[HoloMIT] stats: seq=2, ts=34338,701, component=MediaWriterDual#0Capturer, streamid=0, tile=0, quality=0
Receiver:
- You have joined the session:
[HoloMIT] [SessionManagerController][OnJoinSessionResponse] Joined to session and assigned PlayerID 2123110365
- The pipeline is receiving data:
[HoloMIT] stats: seq=5, ts=54798,204, component=MediaReaderDual#0, fps=16,31, process_time_ms=0, bytes_per_packet=81381, last_stream_id=0, Mbps=20,5