Quick Start Guide
To create all the interfaces necessary to have connection with the different Manager Services, you should go to: "HoloMIT → Holo-Tech → Menu → EssentialControllers".

Pipelines Initializer is the component that initializes all the representation pipelines requirements. So, it should be called before trying to instantiate any representation — the menu or a previous scene is a good point to place it. To do it you should go to: "HoloMIT → Holo-Tech → Menu → PipelinesInitializer".

To create an example Menu connected to all the manager services, you should go to: "HoloMIT → Holo-Tech → Menu → MenuController".

This GameObject contains all the essentials to have an interface to connect and Login in the orchestrator and manager services and start an experience.
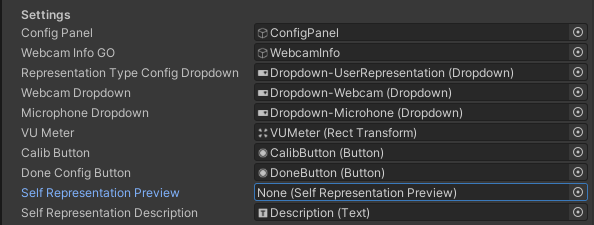
If you want to have a visual preview of how the representations look — or even check if they work properly — you can add the SelfRepresentationPreview prefab going to: "HoloMIT → Holo-Tech → Menu → SelfRepresentationPreview".
Once you add the SelfRepresentationPreview, grab the game object and place a reference into the "Self Representation Preview" parameter in the Automatic Login Manager script that is on the Menu Controller game object at the bottom of the inspector.
With all these steps, you will achieve a functional menu for user login and room selection with all the HoloMIT available representations. Now for the creation of your own room scene, where the different users will meet each other, you should check the "Automatic Login Manager" script that is on the MenuController GameObject.
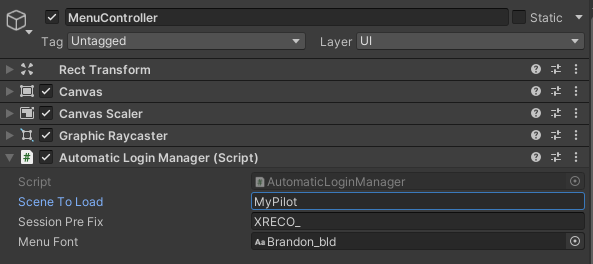
The first parameter, Scene To Load, will be searching for a scene loaded into Build Settings → Scenes In Build to use as the meeting room for the users.
To create your own pilot scene, create a new scene, add it to the Scenes in Build and make sure it has the same name set in the Automatic Login Manager in the field Scene To Load.
⚠️ If the scene is not added to Scenes In Build or does not have the same name, the connection between the MenuController and the instantiation of the room will not work.
Make sure to add both your Menu scene and your Pilot scene to Scenes In Build.
In the custom pilot scene you should set up the scenario where the users will meet in the holo-session and also the HoloMIT components required for that.
Finally, another relevant prefab that contains all the components required to have a scene able to have users, data transmission and interactions is ExampleManager. To add all these essentials, go to: "HoloMIT → Holo-Tech → Pilot → ExampleManager".

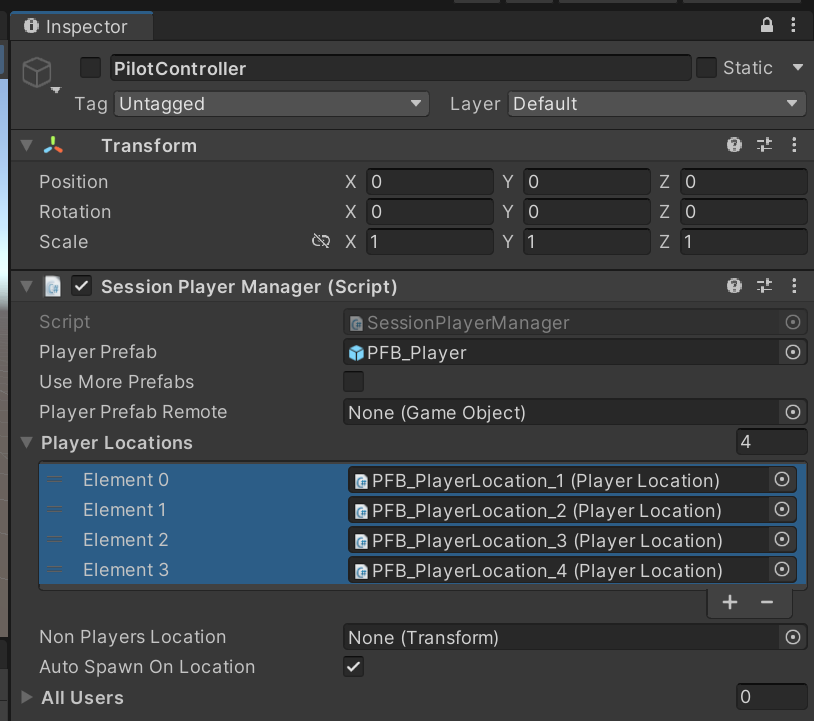
Now that we have everything deployed, the remaining detail is the locations of the players, which should be linked with one script of the previous component called SessionPlayerManager. An example of the disposition and look that these locations should have is PlayerRoot. You can instantiate it going to: "HoloMIT → Holo-Tech → Pilot → PlayerRoot".

Grab the PlayerLocations inside PlayerRoot → Players and place a reference on the SessionPlayerManager script that is on the PilotController game object.
To generate a build, you should do it as usual from "File → Build Settings → Build". Once the build is complete, you must copy and paste the cameraconfig.json from your root Unity project to your root Build folder.